The problem that arises because of this is that it makes switching really hard when somebody is just using two languages. Also, it keeps switching layout as you type. Punctuation changes at any time and you will need to switch the keyboard layout back to what I chose and correct the mistake. Read: How to change Windows Keyboard Layout.
Windows keeps adding Keyboard layouts without permission
Here are the methods that you can use to fix this problem in Windows 11 or Windows 10:
1] Turn off the Automatic Keyboard layout change option
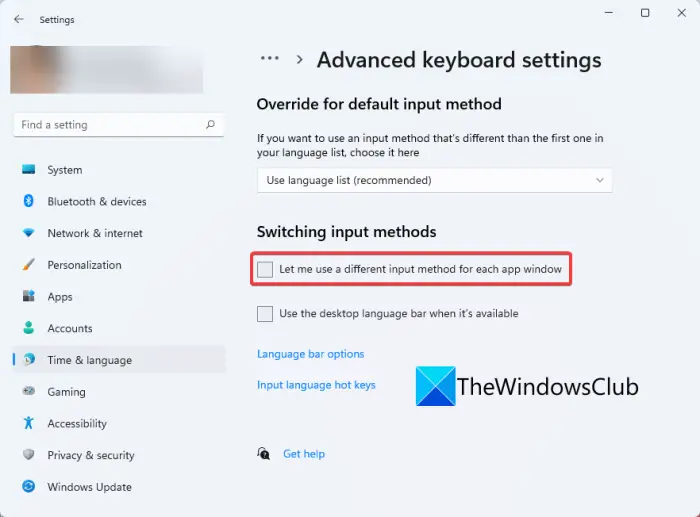
You can try disabling the Automatic Keyboard layout change option to fix the problem. This setting can be tweaked by going to the Advanced Keyboard Settings. Here are the steps to do so: In case it doesn’t fix the problem for you, move on to the next potential fix.
2] Add and then remove the automatic keyboard layout
The first method that you can try is to add the automatically added keyboard layout and then remove it again. It is kind of a workaround and might fix the problem for you. To do that in Windows 11, you can follow the below steps: Firstly, open the Settings app and go to the Time & language tab. Now, from the right panel, tap on the Language & region option. Next, click on the three-dot menu for a language under the Language section. After that, press Language options and then select the Add a keyboard button. Then, choose the automatically added layout to add that keyboard layout. You will see the keyboard layouts under the Keyboards section.
Finally, click on the three-dot menu present next to the previously added keyboard and choose Remove. If the keyboard layout appears again, you will have to repeat the above process again. Windows 10: The OS may randomly add that English US layout, and as someone who uses two layouts, it makes quick switching harder (you need one more keypress, and if you need to switch a lot in a short time, it becomes frustrating.)
From Language preferences, select the English language.Click Options.Click “Add a Keyboard” and select that automatically added layout.After adding it, click on it and click Remove.
Note that may randomly reappear again, and you will have to repeat the step again.
3] Override Microsoft automatic language settings via PowerShell
If you use PowerShell, you can use it to override Microsoft`s default and weird language settings then it does not jump around anymore. You need to find InputTip and Culture settings for your desired settings of course. They can be found online in Microsoft IT Pros documentation. Keep this PowerShell script handy, and execute it whenever you see the layout appear again. If this is happening in your company or a large number of computers, you can use run this script when somebody logs in to the computer.
4] Fix the problem using the Registry Editor
You can try a Registry hack to fix this problem. You will need to create a new DWORD to get rid of this issue. Here is the step by step procedure to resolve the issue using Registry Editor: Firstly, press the Windows + R hotkey to evoke the Run dialog box and enter regedit in it to open up the Registry Editor app. Now, navigate to the following key in Registry Editor: Next, right-click on the right-pan and select the DWORD (32-bit) Value option from the context menu. After that, name the newly created DWORD as IgnoreRemoteKeyboardLayout. Then, double-click on the above DWORD and set its value to 1. Finally, close the Registry Editor app and then reboot your PC. Hopefully, this will fix up the issue for you.
How do I turn off Keyboard Layout Synchronization?
To turn off keyboard layout synchronization in Windows 11, you can follow the below steps: Are you facing similar problems? Do your keyboard jumps to a different language as you type? Let us know if this solution fixed your problem. This post will help you if you are unable to remove a Language from Windows.